Home
Home
How to Fix Waxy AI Skin With the Best Free Naturalizer Tools
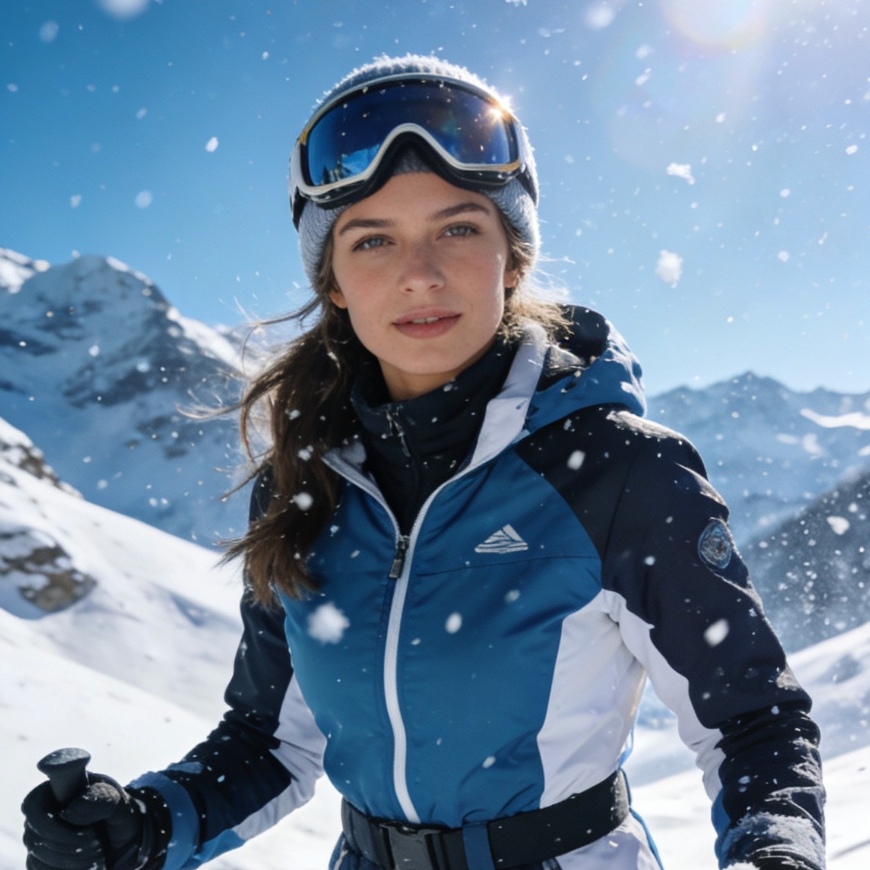
Free AI skin naturalizers like UpscalePro, Fotor, and Relumi are the primary solutions for fixing the "plastic" or "waxy" appearance common in AI-generated portraits. These tools function by reintroducing essential micro-textures, such as pores, fine lines, and subtle skin imperfections, that generative models or heavy beauty filters often erase. Most of these platforms operate on a freemium model, offering daily credits or trial versions that allow users to naturalize images without upfront costs.
Why AI Portraits Often Look Like Plastic Mannequins
The phenomenon often referred to as the "uncanny valley" in AI art is frequently rooted in the skin. When tools like Midjourney, DALL-E, or Stable Diffusion generate a human face, they tend to prioritize aesthetic perfection over biological realism. This results in a surface that appears more like polished vinyl or a wax museum figure than living tissue.
Several technical factors contribute to this artificial look. First is the loss of high-frequency detail. In digital imaging, high-frequency data represents the tiny details—the individual pores, the microscopic hairs, and the slight flakiness of the skin. AI models often "average out" these details during the denoising process, leaving behind only the low-frequency data, which is the smooth gradient of color and light.
Second is the issue of uniform lighting. Real human skin exhibits a property called subsurface scattering, where light enters the skin, bounces around inside the tissue, and exits at a different point. This creates a warm, translucent glow. Standard AI generations often miss the complexity of this interaction, leading to "flat" lighting that makes the skin look like an opaque, painted surface. Finally, the absence of minor imperfections, such as tiny moles, slight redness, or uneven pigmentation, signals to the human brain that the image is synthetic.
The Evolution of AI Skin Naturalizers
Traditional photo editing relied on "frequency separation," a technique where a retoucher splits an image into two layers: one for color/tone and one for texture. To fix a plastic face, a retoucher would have to manually "stamp" skin texture from a high-resolution stock photo onto the flat areas. This was time-consuming and required immense skill.
Modern AI skin naturalizers have revolutionized this workflow. Instead of manual patching, these tools use generative adversarial networks (GANs) or specialized diffusion models trained specifically on macro photography of human skin. When an image is uploaded, the AI analyzes the age, ethnicity, and lighting of the subject and "hallucinates" a biologically appropriate texture. It doesn't just sharpen the existing image; it creates new, realistic data that matches the underlying structure of the face.
Top Free AI Naturalizer Tools for Realistic Texture
Selecting the right tool depends on whether the source image is an AI generation or a real photograph that has been over-edited. Based on current industry standards and user accessibility, the following tools offer the most effective naturalization workflows.
UpscalePro for AI Image Naturalization
UpscalePro has gained significant traction for its dedicated "AI Image Naturalizer" workflow. Unlike general-purpose upscalers that simply increase resolution, this tool focuses on the synthetic artifacts produced by models like Flux or Midjourney.
In a typical use case, an image with "mannequin skin" is processed through a naturalization pass. The AI identifies areas where the skin grain is missing and applies a texture overlay that reacts to the highlights and shadows of the original image. The free tier usually allows for a limited number of high-definition enhancements per day, making it a go-to for hobbyists looking to polish their daily generations.
Fotor AI Skin Retouch
Fotor has long been a staple in online photo editing, but its recent AI updates have pivoted toward "texture preservation." While many mobile apps focus on smoothing skin, Fotor’s AI Retouch tool includes a "Natural" mode.
During our testing, the "Natural" mode stood out because it avoids the blurring effect common in "Beauty" filters. Instead, it targets blemishes and redness while keeping the pore structure intact. For those seeking a free experience, Fotor offers basic processing for free, though high-resolution exports often require a premium subscription or the use of earned credits.
Relumi for Texture Restoration
Relumi (often associated with the Wondershare ecosystem) specializes in "Skin Texture Restoration." This tool is particularly effective for images that have been degraded by old scans or aggressive "beauty modes" on smartphones.
The technical strength of Relumi lies in its intensity slider. For a standard studio portrait that looks slightly too smooth, setting the intensity to 50% often provides the most balanced result. It reconstructs the grain that was lost during JPEG compression. The mobile version of the app provides a surprisingly robust free tier, allowing users to export reconstructed images without watermarks, which is a rarity in the current market.
SparkPix for Removing the AI Look
SparkPix targets the "AI Look" directly. It is designed for users who want to make their AI influencers or digital avatars look indistinguishable from real people. The tool identifies common AI patterns—such as perfectly symmetrical skin or overly vibrant highlights—and dampens them.
One unique feature of SparkPix is its prompt-based customization. Users can specify that they want to "add sun-damaged texture" or "increase freckles," giving them granular control over the naturalization process. While it operates on a credit system, new users typically receive enough starter credits to naturalize several high-resolution portraits.
How to Use an AI Naturalizer Effectively
Simply running an image through a naturalizer isn't always enough. To achieve professional-grade realism, a specific sequence of steps is recommended.
Step 1 Analyze the Source Resolution
AI naturalizers work best when they have a clear understanding of the facial structure. If the original image is low-resolution (e.g., a 512x512 preview from a generator), the naturalizer might struggle to place the pores accurately. It is often better to upscale the image by 2x first using a "neutral" upscaler before applying the naturalization pass.
Step 2 Balance the Intensity Slider
The most common mistake is over-naturalizing. Just as over-smoothing looks fake, adding too much texture can make a subject look decades older or like they have "sandpaper skin."
- 30% to 40% Intensity: Ideal for professional headshots and "clean" AI portraits where you just want to break the plastic surface.
- 50% to 60% Intensity: The sweet spot for realistic lifestyle photography.
- 70% and above: Best reserved for historical photo restoration or creating a "raw" cinematic look.
Step 3 Focus on Zone Specific Editing
Not all skin is the same. The texture on a person's forehead is different from the texture on their eyelids or the bridge of their nose. Advanced tools allow for "zone-specific" application. If your tool doesn't support this, consider naturalizing the image twice at different intensities and using a simple masking tool to blend them, keeping the finer textures around the eyes and coarser textures on the cheeks and chin.
The Role of Micro Imperfections in Realism
A truly naturalized image isn't just about pores; it's about the "chaos" of biology. Real skin has subtle color variations. There are tiny veins near the temples, slight dark circles under the eyes, and unevenness in the tan.
Many premium-tier naturalizers now include "imperfection generators." Instead of just a uniform grain, they add "micro-spots" and "subtle moles." When using free tools, you can often mimic this by using a "Film Grain" filter at a very low opacity (around 2-3%) after the AI naturalization is complete. This adds a layer of digital noise that breaks up the mathematical precision of the AI-generated pixels.
Why You Should Avoid Simple Sharpening Filters
A frequent error users make when trying to "un-blur" a face is reaching for the "Sharpen" or "Clarity" slider in apps like Lightroom or Instagram. This is fundamentally different from AI naturalization.
Sharpening works by increasing the contrast at the edges of existing pixels. If the skin is smooth (meaning there are no edges), sharpening will only find the "noise" or "compression artifacts" and make them look like harsh digital grit. It does not create pores; it only creates white halos around existing blurry data. AI naturalization, on the other hand, is a generative process. It understands the concept of "skin" and draws the missing detail from its training data.
Comparing Free vs Paid AI Naturalizers
While the "free" aspect is highly sought after, it is important to manage expectations. Paid tools like Magnific AI are known for "hallucinating" incredible amounts of detail, but they come at a high monthly cost.
Free tools usually offer:
- Lower Output Resolution: You might be limited to 1080p or 2K exports.
- Daily Limits: You might only be able to process 3 to 5 images per day.
- Basic Algorithms: The texture might be more repetitive compared to the deep-learning models used by high-end professional suites.
However, for 90% of social media use cases, the free versions of UpscalePro, Fotor, or SparkPix are more than sufficient. They provide the "texture pass" needed to make an AI image look like a real photo viewed on a smartphone screen.
What is an AI Skin Naturalizer?
An AI skin naturalizer is a specialized software tool that uses machine learning to restore or create realistic skin textures in digital images. Its primary function is to reverse the "plastic" look caused by AI image generators or aggressive photo editing filters. By analyzing the facial structure and lighting, it adds microscopic details like pores, fine lines, and natural skin grain, making the subject appear human rather than synthetic.
How to Get the Best Results with Free Tools?
To maximize the quality of free AI naturalizers, always start with the highest resolution image possible. Avoid using the tool on images that have already been compressed multiple times (e.g., screenshots of screenshots). Furthermore, use the "Natural" or "Classic" settings rather than "Beauty" or "Glamour" modes, as the latter will often conflict with the naturalization process by trying to smooth the very textures you are trying to add.
Is there a completely free AI skin naturalizer without watermarks?
Completely free, unlimited, and watermark-free tools are rare because the GPU processing required for AI generation is expensive. However, Relumi and some modules within OverChat AI offer generous free tiers that allow for high-quality exports without watermarks, often in exchange for watching an ad or operating within a daily credit limit. Another option is using locally hosted AI models like Stable Diffusion with "ControlNet" or specialized "Loras" for skin texture, which are entirely free if you have the necessary hardware (PC with a dedicated GPU).
Summary
The "plastic skin" problem is a byproduct of how current AI models interpret human beauty—focusing on smoothness rather than the complex, messy reality of biology. AI skin naturalizers bridge this gap by reintroducing the high-frequency details that our brains use to identify a "real" person.
For those looking for free options, tools like UpscalePro and Fotor provide accessible entry points. By focusing on texture reconstruction rather than simple sharpening, these tools allow users to pull their images out of the "uncanny valley." Whether you are a digital artist trying to make an avatar look more relatable or a photographer fixing an over-edited portrait, the key is moderation. The goal isn't "perfect" skin; the goal is skin that looks like it belongs to a living, breathing human being.
Frequently Asked Questions
Does AI naturalization work on all skin tones?
Yes, modern AI skin naturalizers are trained on diverse datasets. High-quality tools like Relumi and UpscalePro adjust the texture and "glow" based on the specific melanin levels and lighting conditions of the subject to ensure the results look authentic across all ethnicities.
Can I use these tools for professional headshots?
Many professionals use AI naturalizers as a final "polish" step. For LinkedIn profiles or corporate headshots that have been over-processed, a light pass through a tool like Fotor can restore the "approachability" that is often lost when skin looks too perfect.
Will naturalizing an image make it look older?
If the intensity is too high, yes. Adding deep pores and fine lines can inadvertently mimic the signs of aging. To keep a subject looking young but real, keep the intensity slider below 40% and focus texture on the T-zone (forehead and nose) while keeping the cheeks slightly smoother.
Is my data safe when using these online tools?
Most reputable AI photo tools have privacy policies stating that images are deleted from their servers after processing. However, always read the terms of service, especially if you are processing sensitive or private photos.
Can I naturalize a photo on my phone?
Yes, apps like Lensa and Relumi offer mobile versions of their AI naturalization technology. These are often the most convenient ways to fix "beauty mode" smoothing that is baked into many smartphone camera apps by default.
-
Topic: AI Skin Enhancer Apps: 5 Best Tools to Perfect Skin | AI Hubhttps://overchat.ai/ai-hub/best-ai-skin-enhancers
-
Topic: Free AI Skin Texture Enhancer — AI Beauty Filter Online | VicSeehttps://vicsee.com/ai-skin-texture-enhancer
-
Topic: Remove AI Look from Photo Free Online | sparkpix.ai | sparkpix.aihttps://sparkpix.ai/aitools/remove-ai-look