Home
Home
Stop Making Your AI Images Look Fake by Adopting a Professional Photographer's Mindset
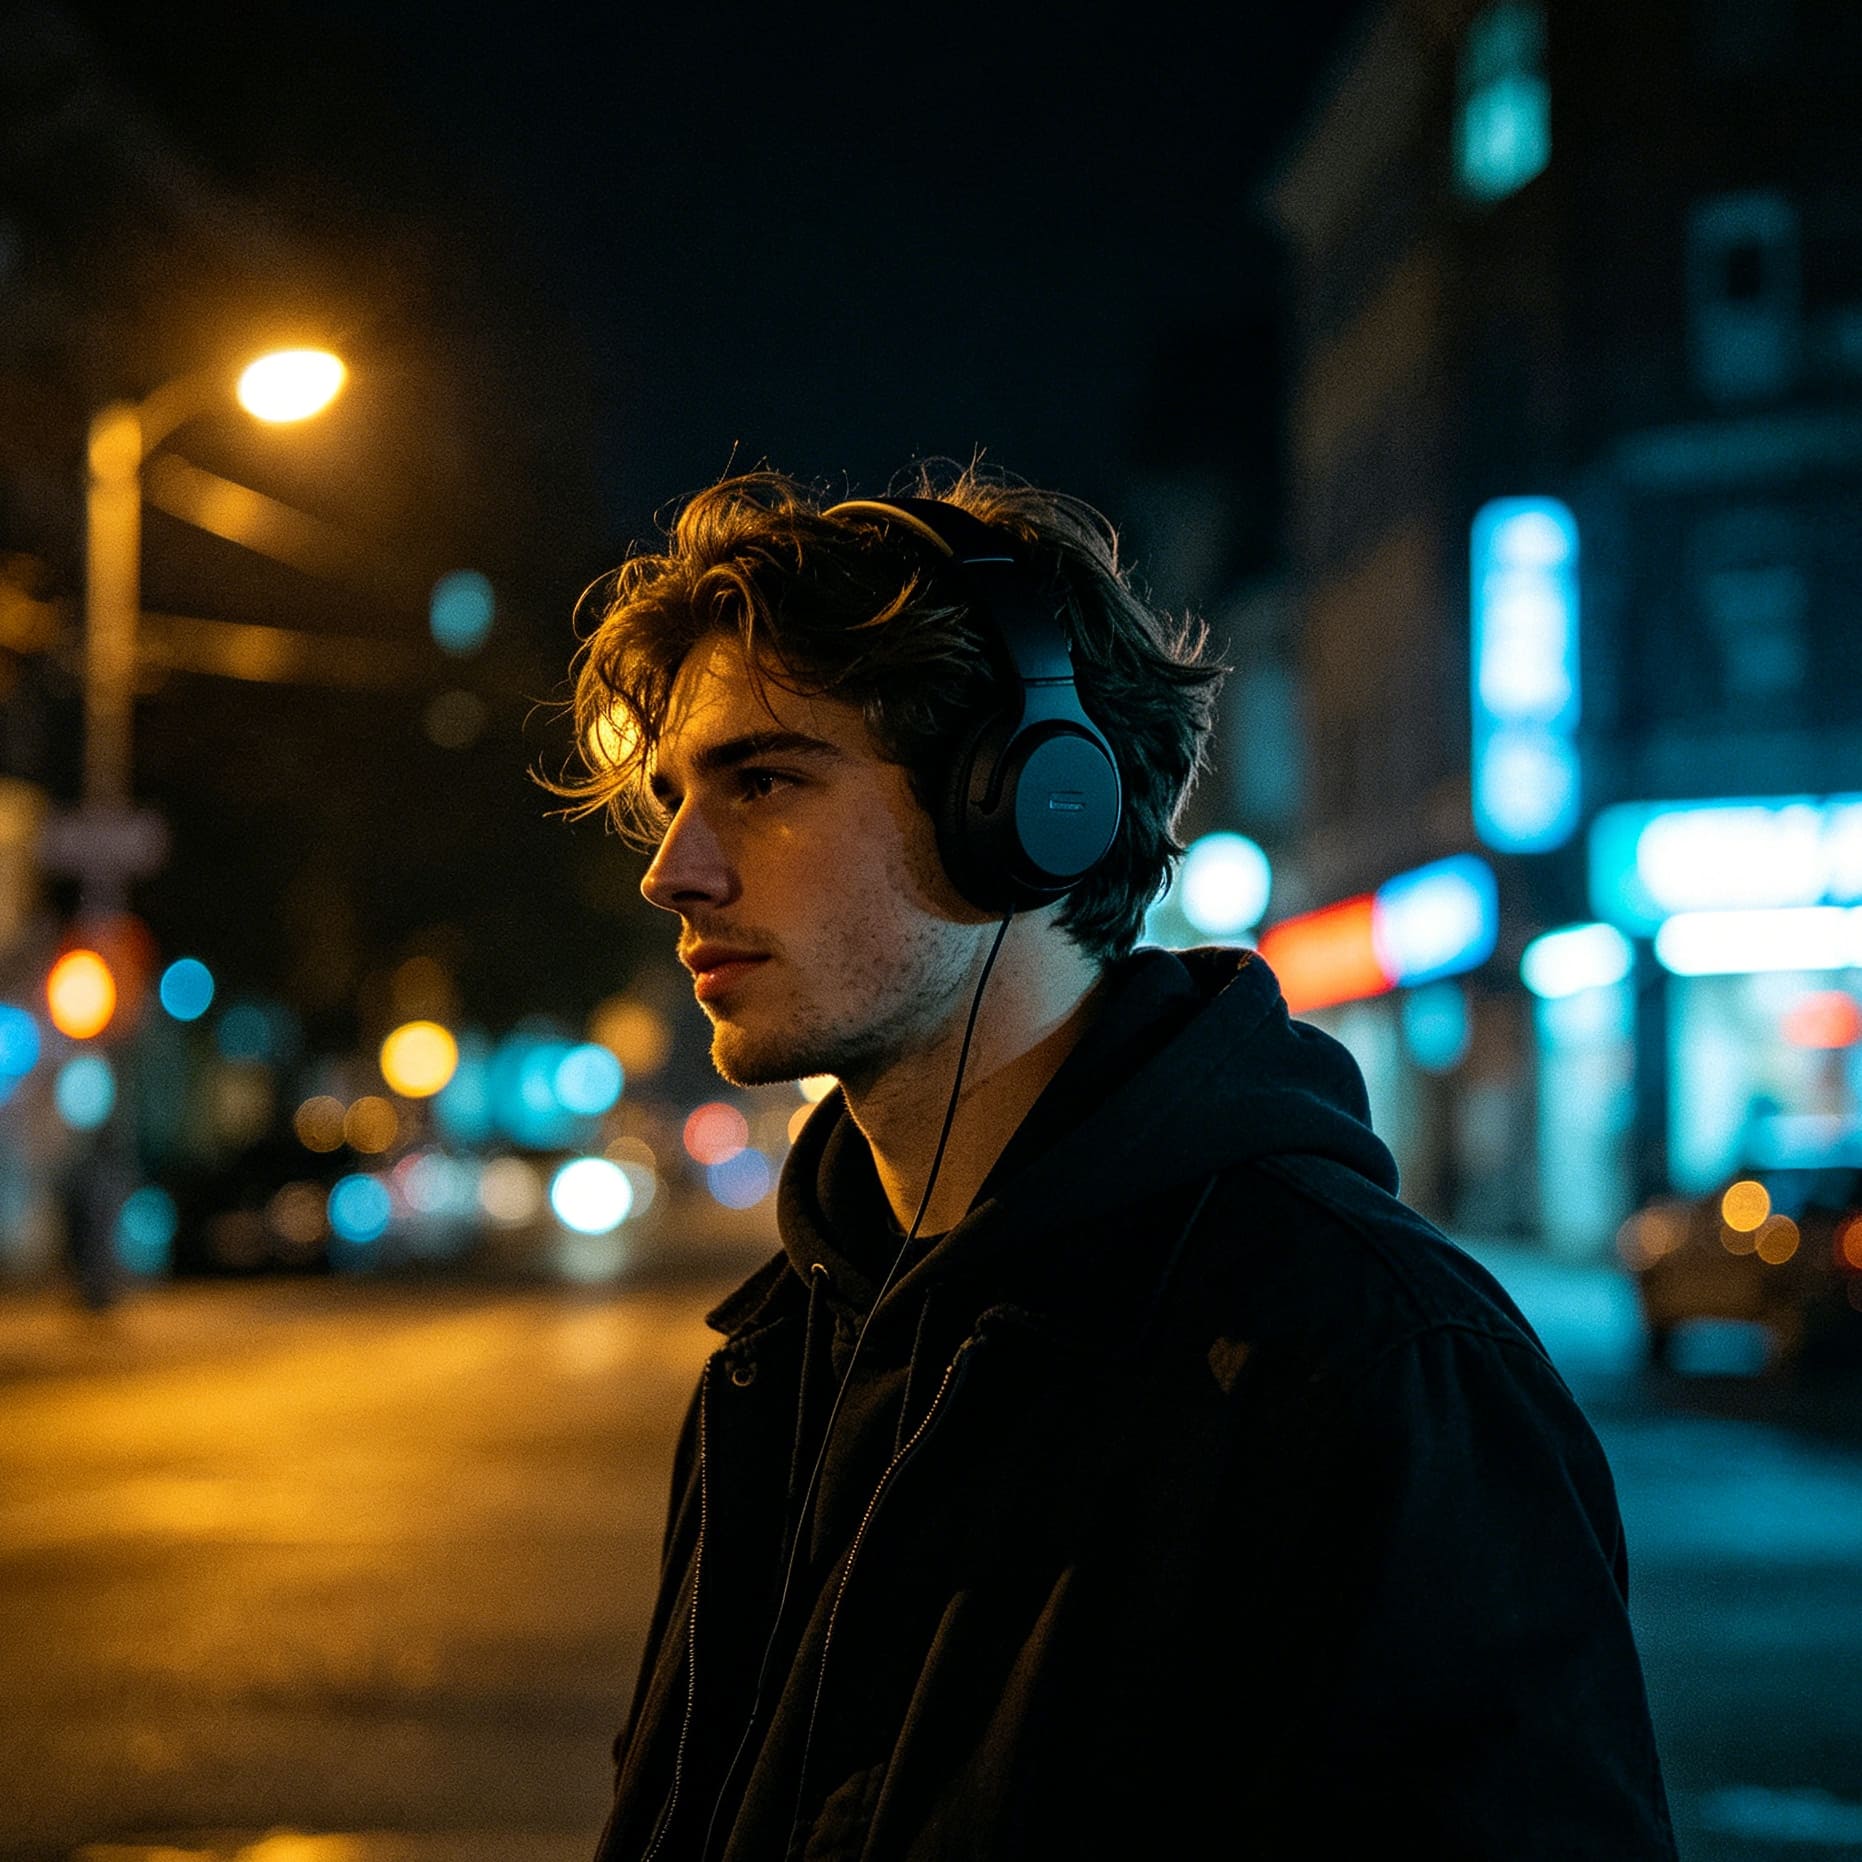
The primary reason most AI-generated images look "fake" is not a lack of resolution or detail; it is the presence of "digital perfection." Most generative models default to a clean, hyper-saturated, and perfectly symmetrical aesthetic that the human eye immediately identifies as synthetic. To generate truly photorealistic images, the workflow must shift from describing a generic scene to simulating the physical laws of optics, lighting, and chemical film.
Achieving photorealism is an exercise in "thinking like a photographer." By providing the AI with instructions that mimic a camera's physical limitations and a professional's stylistic choices, you can force the model to abandon the "AI look" in favor of something indistinguishable from reality.
Why Do AI Images Look Artificial?
Before mastering the solution, it is vital to understand the "AI artifacts" that break immersion. Standard AI generations often suffer from:
- Excessive Sharpness: Real photos have a specific plane of focus; AI often tries to make everything equally sharp.
- Impossible Lighting: Light in nature follows the inverse-square law and bounces off surfaces. AI often generates "ambient glows" that have no physical source.
- Plastic Skin: Without specific prompts for texture, models like Midjourney or Stable Diffusion default to airbrushed skin that lacks pores, fine hairs, or micro-wrinkles.
- Perfect Symmetry: Human faces and natural environments are subtly asymmetrical. Digital perfection is a dead giveaway of synthetic origin.
The Photographer’s Blueprint for Photorealistic Prompts
A high-performance photorealistic prompt is structured like a camera’s metadata (EXIF data) combined with a director’s scene description. Instead of writing "a man in a forest," a professional prompt stacks layers of physical reality.
1. The Subject: Specificity Over Generality
Don't just name the object; describe its state.
- Instead of: "A cup of coffee."
- Try: "A weathered ceramic mug of black coffee, steam rising in thin wisps, condensation droplets on the rim, chipped handle."
2. Environment and Atmosphere
The air between the camera and the subject affects the image. Mentioning "dust motes," "haze," or "humidity" adds a layer of depth that prevents the image from looking flat.
3. Lighting Physics
Lighting is the most significant factor in photorealism. Avoid vague terms like "cinematic lighting." Instead, use terms that describe the light's quality and direction:
- Rembrandt Lighting: Creates a small triangle of light on the shadowed cheek.
- Backlit / Rim Lighting: Separates the subject from the background with a thin halo of light.
- Overcast / Diffuse Light: Provides soft shadows, common in candid street photography.
- Golden Hour: Low-angle, warm sunlight (approx. 3500K color temperature).
Choosing the Right Lens and Focal Length for AI Accuracy
Lenses dictate the geometry of a scene. When you tell an AI to use a specific focal length, you are telling it how to compress space and distort (or flatten) the subject's features.
The 85mm Prime: The Gold Standard for Portraits
In professional photography, an 85mm lens is used for portraits because it provides a flattering compression of facial features and a beautiful "bokeh" (background blur).
- Prompt Keyword: "Shot on 85mm lens, f/1.8 aperture, shallow depth of field."
- Experience Tip: In our testing with Flux.1, specifying the f-stop (like f/1.2 or f/1.8) is more effective for creating natural background separation than simply using the word "blurred."
The 35mm Lens: The Choice for Candid Realism
A 35mm lens mimics the human field of view. It is the staple of street and documentary photography. It feels "honest" because it doesn't look staged.
- Prompt Keyword: "35mm wide-angle, candid street photography, eye-level shot."
The 24mm Lens: Architectural and Landscape Scale
Wide lenses introduce subtle barrel distortion at the edges, which is a physical reality of glass.
- Prompt Keyword: "24mm wide-angle lens, shot from a low angle, architectural photography."
How to Describe Textures to Eliminate the Plastic Look
The human brain is highly sensitive to surface textures. If a material looks too smooth, the "Uncanny Valley" effect kicks in. To bypass this, you must explicitly demand micro-details.
Skin Texture and Human Details
To make a face look real, you need to describe the imperfections.
- Key Terms: "Visible skin pores," "fine wrinkles," "uneven skin tone," "freckles," "slight perspiration," "peach fuzz."
- Observation: When using Midjourney v6, adding the parameter
--style rawcombined with keywords like "candid" and "unposed" significantly reduces the over-stylized, "smooth" skin effect.
Fabric and Material Details
- Textiles: "Coarse linen weave," "frayed denim edges," "pilling on a wool sweater."
- Hard Surfaces: "Brushed aluminum," "scuffed leather," "oxidized copper," "fingerprints on glass."
Embracing Imperfection: The Secret to True Realism
Ironically, the best way to make an image look real is to make it "worse." Professional cameras and film stocks have inherent flaws that we associate with reality.
Film Grain and Analog Cues
Digital sensors have "noise," and film has "grain." Adding these to your prompt breaks the smooth gradients of AI.
- Prompt Keywords: "35mm film grain," "Kodak Portra 400 aesthetic," "slight motion blur," "chromatic aberration."
Lighting Imperfections
- Lens Flare: Light hitting the lens directly.
- Light Falloff: The way light naturally fades into shadows.
- Color Fringing: A common optical issue where colors bleed at high-contrast edges.
Comparing AI Models: Which One Is Best for Photorealism?
Not all models are created equal. Based on extensive rendering tests, here is how the top models stack up for realistic output.
1. Flux.1 (Dev/Pro)
Flux has recently emerged as a leader in anatomical realism. Its ability to render hands, skin folds, and complex lighting is currently superior to standard SDXL models.
- Strengths: Exceptional prompt adherence; realistic skin anatomy; handles text and complex scenes without warping.
- Hardware Requirement: Running Flux.1 Dev locally typically requires at least 24GB of VRAM for optimal speed.
2. Midjourney v6.1
Midjourney remains the most accessible for high-end aesthetics, but it requires "fighting" its internal beauty filter.
- Experience Note: To get realism in Midjourney, always use the
--style rawcommand. Without it, the model tends to make people look like fashion models rather than real human beings.
3. Stable Diffusion XL (SDXL) with Custom Checkpoints
Base SDXL is mediocre for photorealism, but the community-trained "checkpoints" are elite.
- Recommended Models: RealVisXL, Juggernaut XL, or EpicRealism.
- Advantage: Full control over negative prompts, which allows you to explicitly forbid "3d render," "cartoon," and "smooth skin."
Advanced Technical Settings for High-Resolution Results
The prompt is only half the battle. Technical parameters influence how the AI interprets the pixels.
Sampling Steps
For photorealism, you need enough steps for the model to refine textures, but too many can cause over-sharpening.
- Sweet Spot: 30–50 steps for DPM++ 2M Karras samplers.
Guidance Scale (CFG)
The Guidance Scale tells the AI how strictly to follow your prompt.
- Realism Tip: A high CFG (above 10) often makes images look "crunchy" and over-saturated. For realism, keep CFG between 3.5 and 7.0. This allows the model more "creative freedom" to apply natural lighting transitions.
Negative Prompts
In Stable Diffusion, what you don't want is as important as what you do.
- Standard Negative Prompt: (worst quality, low quality, normal quality, lowres, monochrome, grayscale, skin spots, acnes, skin blemishes, age spot, 3d render, cg, cartoon, illustration, airbrushed, plastic, semi-realistic).
Why Post-Processing Is Necessary for Professional Results
A common mistake is thinking the raw AI output is the final product. Professional AI artists always use a secondary step.
AI Upscaling
AI generates images at a relatively low base resolution (usually 1024x1024). Scaling this up using tools like Topaz Photo AI or Magnific AI adds a layer of "hallucinated" detail—sharpening eyes, defining hair strands, and cleaning up compression artifacts.
Color Grading
Running the AI image through Adobe Lightroom or DaVinci Resolve allows you to apply professional color profiles. Adjusting the "black point" and adding a subtle "S-curve" to the contrast can make an AI image feel like it was professionally color-graded for a movie.
What Are the Most Common Realism Mistakes to Avoid?
- Over-prompting: Don't use 200 words. The AI gets confused. Keep the core subject clear and let the camera/lighting keywords do the heavy lifting.
- Neglecting the Background: A realistic face in front of a blurry, non-sensical blob of colors will still look fake. Prompt for "a cluttered apartment background" or "out-of-focus city traffic."
- Ignoring Hands and Limbs: Even the best models fail occasionally. Check the finger count and joint angles. If they are wrong, the photorealism is instantly destroyed.
- Using "High Definition" Keywords: Words like "4k," "8k," and "Ultra HD" are mostly useless in modern models. They often lead to "crunchy" over-sharpened images rather than actual detail. Use "micro-detail" or "sharp focus" instead.
Summary Checklist for Photorealistic AI Generation
To ensure your next generation hits the mark, run through this checklist:
- Subject: Is it described with specific textures and states (e.g., "weathered," "damp")?
- Lighting: Is there a clear source and type (e.g., "side-lit by window light")?
- Camera: Is a specific focal length (e.g., "50mm") and aperture (e.g., "f/2.8") mentioned?
- Model: Are you using a realism-tuned model like RealVisXL or Flux.1?
- Imperfections: Have you added "film grain," "pores," or "candid" to break the perfection?
- Settings: Is the CFG scale low enough (4-7) to allow for natural blending?
FAQ: Mastering AI Photorealism
How do I make AI skin look real?
Avoid "flawless" or "beautiful" in your prompt. Use keywords like "skin pores," "natural skin texture," "fine lines," and "sweat." If using Stable Diffusion, use a negative prompt to exclude "plastic" and "airbrushed."
What is the best AI for realistic human faces?
Currently, Flux.1 and Midjourney v6.1 are the top contenders. Flux excels at anatomical accuracy and hands, while Midjourney offers superior "cinematic" textures with less effort. For those who want full control, Stable Diffusion XL with the EpicRealism checkpoint is the professional standard.
Does mentioning a specific camera brand help?
Yes. Mentioning "Shot on Sony A7R IV" or "Shot on Leica M10" signals the model to mimic the color science and sensor characteristics associated with those high-end cameras. While not a magic bullet, it helps set the "style" of the digital file.
Why does my AI art look like a 3D render?
This usually happens because the lighting is too flat and the surfaces are too reflective/smooth. Lower your Guidance Scale (CFG), add "diffuse lighting," and explicitly use the negative prompt "3d render, unreal engine, octane render."
How do I get realistic background blur?
Use the term "Shallow depth of field" or specify a wide aperture like "f/1.4" or "f/1.8." You can also mention "creamy bokeh" to describe the quality of the blur.
By moving away from "artistic" descriptions and leaning into the technical language of photography, you can bridge the gap between AI generation and professional photography. The goal isn't to create a perfect image, but a believable one.
-
Topic: Generating Images with Stable Diffusion | Generative AI Serieshttps://docs.vultr.com/public/doc-assets/pdfs/article/generating-images-with-stable-diffusion-generative-ai-series.pdf
-
Topic: How to Create Realistic Images with AI by MariaAITools on DeviantArthttps://www.deviantart.com/mariaaitools/art/How-to-Create-Realistic-Images-with-AI-1229602212
-
Topic: Generate photorealistic images with AI modelshttps://picsart.com/tutorials/generate-photorealistic-images-with-ai-models/